
In my previous post, I gave you a
brief introduction to PIC 16f84A microcontroller. There’s a lot more to cover
before moving on to programming section. But, I have decided to show you a
simple assembly program, just to keep you guys interested in this topic and to understand
the basic concepts. It will blink two LEDs as in an LED robot circuit.
To write and run this program,
you’ll need the following softwares.
- MPLAB IDE- a free assembly language compiler provided by Microchip, the manufacturer of PIC microcontrollers.
- Proteus ISIS- to simulate your program before going to hardware level.
Follow these steps after downloading the required softwares.
1. Install
MPLAB IDE.
2. Go to File>>New.
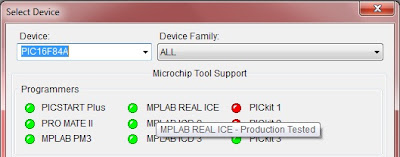
3. Go
to Configure>>Select Device and select PIC16F84A.
4. Type(or copy) following assembly code into the code window. Don’t worry if you don’t understand the code.
 ;;;;;;define registers;;;;;;;
 STATUS equ 03h
 TRISA   equ 85h
 PORTA  equ 05h
 COUNT equ 08h
 ;;;;;;configure I/O ports;;;;;;;
 bsf  STATUS,5
 movlw 00h
 movwf TRISA
 bcf  STATUS,5
 ;;;;;;Turn LED1 on,LED2 off;;;;;;;;;;
 Begin movlw 01h
       movwf PORTA
 ;;;;;;Call the delay;;;;;;;
 call Delay
 ;;;;;;Turn LED1 off,LED2 on;;;;;;;;
 movlw 02h
 movwf PORTA
 ;;;;;;Call Delay again;;;;;
 call Delay
 ;;;;;go back to the beginning;;;;;;
 goto Begin
 ;;;;;Delay subroutine;;;;;
 Delay
 Loop decfsz COUNT,1
       goto Loop
 return
 ;;;;;end of program;;;;;
 end
5. Save it somewhere in your hard drive as “firstprog.asm”. Remember this location.

6. Now,
go to Project>>Quick Build(firstprog.asm)
If you have followed so far
properly, you should get a message which says “BUILD SUCCEEDED”. Now you have
successfully compiled your program.
You’ll find a file named firstprog.HEX,
where you have saved the program code. It is the firmware which we place in the
PIC microcontroller. Now we are ready to do a simulation of the program.
Simulation
1. Download
Proteus ISIS and launch it.
2. Click
on “Component mode” icon at the left corner and double click on the white area
under “Devices”.

3. Then,
you can search and select any device you want. In this case, we need 2 LEDs and
one PIC18F84A microcontroller. Type the microcontroller number in the search
box. The results will be displayed in the field to the right. Double click on
the selected component, so it would be added to your list of devices.


4. Design
the circuit as shown in the following picture.(Check the Youtube video below)

5. Double click on the PIC16F84A and locate the firstprog.HEX file.

6. The
Blinker is now ready to run. So finally, hit the “play” button in the bottom
left corner of the screen to begin the simulation.

If everything goes alright, The
Blinker will start blinking, one LED at a time.